Essential Dos and Don’ts for Stainless Steel Cable Railing Installation

Installing stainless steel cable railings can significantly enhance the look and feel of your home or outdoor space. However, doing it right is key to making sure they're not only beautiful but also safe and long-lasting. This article will walk you through the important steps and precautions to take when installing these railings. We'll cover what you should do, like planning carefully and choosing quality materials, as well as what you shouldn't do, such as rushing the job or skimping on hardware. With clear instructions and practical tips, you'll be equipped to tackle this project with confidence.

Getting to Know Stainless Steel Cable Railings
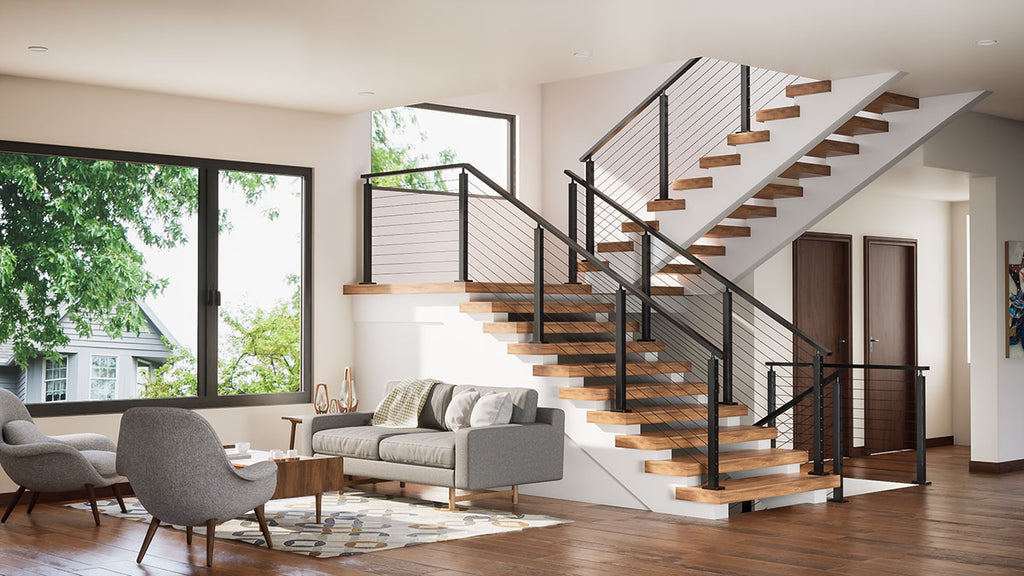
If you're considering stainless steel cable railings for your home, it's important to understand what they are and the benefits they offer. Simply put, these railings use horizontal or vertical cables in place of traditional balusters or spindles, which are the vertical posts that traditionally support the handrail. The sleek look of the stainless steel cables provides a modern touch and an open view that many homeowners appreciate.
The cables themselves are typically made from high-grade stainless steel, which is known for its durability, resistance to rust, and ability to withstand harsh weather conditions—qualities that make it ideal for outdoor decks, balconies, and staircases. When installed correctly, they require minimal upkeep and can last for decades.
These railings are not only about appearance; they're also about safety and compliance with local building codes. Before starting the installation process, it's essential to check with your local building department to ensure your design meets all the required standards for load, height, spacing, and more. This ensures that your railing will be both safe and legal.
Lastly, planning your cable railing system requires careful consideration of the layout. You'll need to determine the spacing between posts to ensure the cables can provide enough barrier without sagging. Proper tension is key; too loose and they won't meet safety standards, too tight and they could cause structural issues.
Dos of Cable Railing Installation
When you're ready to start your cable railing project, following these dos will set you up for a successful installation:
1. Research Local Building Codes:
Before you even purchase your materials, check with your local building authority about the specific codes and standards for cable railings. This step is crucial as it ensures that your installed railings are safe and legally compliant.
2. Source High-Quality Stainless Steel Cables and Components:
Choose marine-grade 316 stainless steel, especially if you live in a coastal area or a place with harsh weather conditions. This grade offers the best resistance against corrosion and maintains its strength over time.
3. Carefully Design Your Layout:
Plan the layout of your posts and the spacing of your cables. Ensure that the spacing complies with safety standards, which usually require that the cables be close enough together so that a 4-inch sphere cannot pass through at any point along the railing.
4. Assemble the Proper Tools and Safety Gear:
Gather all the necessary tools before starting. You'll need items like a cable crimper, cutter, and various wrenches, as well as safety gear like gloves and eye protection.
5. Take Time to Review Manufacturer Instructions:
Every cable railing system comes with a set of specific instructions from the manufacturer. Follow these closely as they're designed for the optimal installation of their particular system.
6. Pay Close Attention to the Tension of the Cables:
Correct tension is key. Cables should be taut enough that they don't sag, but not so tight that they put undue stress on the posts. Use a tension gauge to get this right, aiming for an even and consistent tension across all cables.
7. Conduct Regular Inspections for Signs of Wear or Damage:
Periodically check all aspects of your railing, looking for any signs of damage, loosening, or wear and tear. Early detection of potential problems can prevent more significant issues down the line.
8. Follow a Consistent Cleaning Regime Using Appropriate Materials:
Clean your stainless steel railings with mild soap and water to maintain their appearance and integrity. Avoid abrasive cleaners that could scratch the surface.
9. Stay Proactive in Tightening and Maintaining Tension in the Cables:
Over time, cables may stretch slightly and require re-tensioning. Regular maintenance checks will tell you when it's time to adjust the cables to keep them within safety standards.
Don’ts of Cable Railing Installation
Avoiding common installation mistakes is just as important as following best practices. Here are some don'ts to keep in mind:
Preparation
- Don’t Skimp on Building Code Research: Never guess or make assumptions when it comes to building codes and safety standards. Ignoring these can lead to failed inspections, additional costs, or even having to redo the work.
- Don’t Compromise on Material Quality for Cost: Opting for cheaper materials might save you money upfront, but can lead to issues such as rust or structural failure down the line. Invest in high-quality stainless steel, especially for outdoor installations.
- Don’t Overlook Planning Details: Detailed planning cannot be overstated. Inaccurate measurements or spacing can result in non-compliant railings that might need expensive modifications. Take the time to plan your layout meticulously.
Installation
- Don’t Rush the Installation Process: It's understandable to be excited to see your new railings in place, but rushing can cause mistakes. Take it step by step to ensure every component is correctly installed.
- Don’t Ignore Manufacturer Instructions: Each railing system has unique components and specifications. Ignoring the instructions could mean incorrect installation, which may not hold up over time or under stress.
- Don’t Underestimate the Project Complexity: Even if you're a DIY enthusiast, recognize when a project might be beyond your skill level. There's no harm in consulting with or hiring a professional installer if needed.
Post-Installation & Maintenance
- Don’t Ignore Signs of Distress or Damage: If you notice anything amiss, such as loose fittings or frayed cables, address it promptly. Failing to do so could jeopardize the safety of the railing system.
- Don’t Use Harsh Chemicals or Abrasive Tools: Stainless steel can be damaged by chlorine, bleach, and abrasive cleaners or tools, which can scratch the surface and lead to rust formation.
- Don’t Neglect Regular Maintenance: Keep up with cleaning and inspecting your cable railings. Postponing maintenance can allow small problems to grow into bigger, more costly ones.

How to Troubleshoot Common Issues
Even with careful installation, you might encounter issues with your stainless steel cable railings over time. Here's how to troubleshoot some common problems:
- Sagging Cables: If cables start to sag or loosen, they could become non-compliant with safety standards. To fix this, adjust the tensioning hardware according to the manufacturer's instructions to restore proper tension.
- Corrosion Spots: While stainless steel is resistant to rust, it can still occur, especially in coastal areas or around pools where salt and chlorine are present. Clean any spotted areas with a specialized stainless steel cleaner and soft cloth. To prevent future corrosion, apply a protective layer of stainless steel polish or protectant.
- Scratches on Posts or Railings: Minor scratches can often be buffed out using a non-abrasive pad and a rubbing compound designed for stainless steel. For deeper scratches, you may need to seek professional help to avoid further damage.
- Difficulty Maintaining Tension: Over time, fittings can become worn, making it difficult to maintain the correct tension. Inspect the hardware; if it shows signs of wear, consider replacing it.
- Broken or Frayed Cables: Replace damaged cables immediately to maintain the structural integrity of the railing system. It's a good idea to keep spare cables on hand for quick replacements.
- Loose Fittings: Periodically check all fittings, bolts, and screws to make sure they haven't loosened from use or vibration. Tighten them up as needed, being careful not to over-tighten and strip the threads.
When troubleshooting any issues, always refer back to the original manufacturer’s guidelines to ensure that you’re addressing the problem correctly. If at any point you feel unsure about how to proceed, it's better to consult with a professional rather than risking further damage or creating a safety hazard. Regular checks and timely repairs will keep your cable railing system looking great and functioning safely.
Final Thoughts on Installing Stainless Steel Cable Railings
Installing stainless steel cable railings is about more than just the sleek look—it's a commitment to safety and quality. To get it right, you need to follow local codes, use the best materials, plan meticulously, and take your time with the installation. Avoid shortcuts that could compromise the integrity of your railing. Regular maintenance is key to longevity, so inspect, clean, and adjust as needed. If you ever feel out of depth, don't hesitate to call in a professional. With this approach, your cable railings will be a secure and stunning addition to your home for many years.

Custom Design Solutions - Fast and Free
Our experts can do all the planning, designing, and budgeting work for you without extra charge.
● Customized Design
● Shopping List
● Budget
